|
|
||
|
Applying a Custom Icon |
||
| Firstly, what is a custom icon and why use one? | ||
|
Windows XP has the capability to display a
different icon for each folder. In the example shown a custom icon has
been assigned to a folder making the folder stand out from the rest and
therefore easier to locate. Note: Scroll down to see the complete set of instructions............. |
||
| Applying a custom icon to a folder is easy. | ||
|
1. First obtain an icon file. A
vast number of these are available on the web and Glandore icons are
available on our download page. Save the icon file in any directory.
Don't try and run this file it's not executable. |
|
|
|
Glandore icon assigned to a folder called Masonic |
||
|
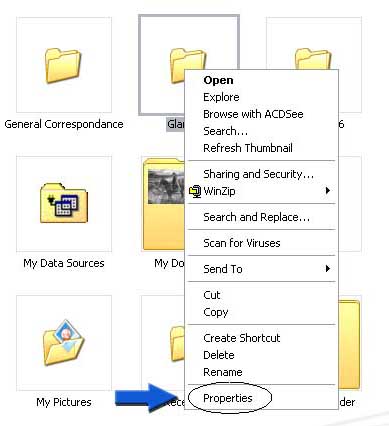
2. Working in My Computer, or Windows
Explorer,. Select a folder and right click. Properties. The
properties box will appear.
|
 |
|
|
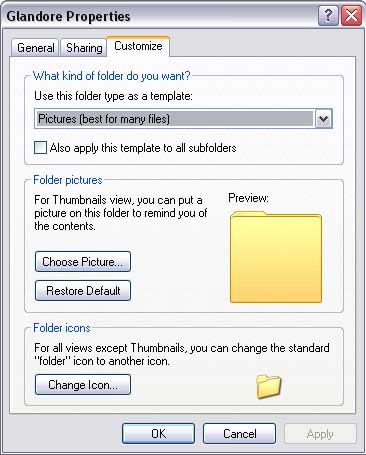
3. Select the customise tab, then select
the change icon button. (Bottom Left) Note: You can do a number of things with this form, but when experimenting be careful when checking the 'Also apply this template to all subfolders' checkbox, as you can end up applying the change too widely. |
 |
|
|
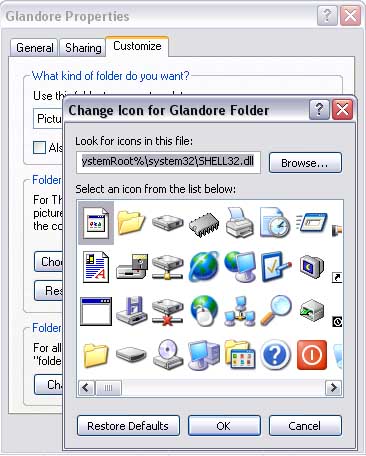
4. Select the browse button. Browse
to where you saved the icon file and select this. OK the form and
select apply.
The new icon has now been associated with the selected folder. Note: This also works for Internet explorer Favourites so if you have a favourites link to the Glandore website, (and if not, why not) then use the above procedure to apply a custom icon to the link. |
 |
|